Wednesday, March 28, 2012

Forsythia!

The other day I saw these beautiful yellow spring flowers in town, and I got so inspired that I had to do my nails. I made a matte, light yellow base and painted on some easy branches. The forsythia branches are actually straight, cause it's a bush, but I didn't think that would look as pretty so I made typical cherry blossom branches instead. The flowers however, I didn't change. Mostly because 4 petal flowers are much easier to paint, but also because I didn't want it to look like yellow sakura. As you can (hopefully) see, I made some from the side, with only two petals, and some from the front, with 4 petals.


Here's a picture of them inside, newly painted. I hadn't cleaned up my edges yet. 
I'm not wearing a top coat because I wanted the branches to be shiny, but keep the background matte, and trying to go over the branches with a fast drying top coat would've been not only difficult, but tedious. I will top coat them in a day or so, to keep the design longer. I'll probably also keep it matte. 


Another picture, outside. The yellow is so much lighter than inside, which is why I really like it. I'm holding a forsythia branch as well. Don't you just love all the inspiration that comes with spring?
Tialiq

Thursday, March 22, 2012

Hunger Games!

Yes! Tomorrow I'm seeing the Hunger Games, and I'm sooo excited. That also means I was super excited to make this nail design, special events call for special nails! Now, I try to wear at least slightly complicated designs all the time, and I didn't want to add stones or glitter to this one, but I used a lot of different techniques which is what made it extra special. Here we go! 


This is also the first time I'm displaying my right hand, which is the lower picture.


Since I'm so excited about this design I'm gonna ramble about how it's made. 
I started yesterday by making the mocking jay pins using the plastic bag method, I wanted both to be the same size so I made one for each hand, not just my right one. Then I practiced a method I don't recall the name of, but it's how I made my fires. It took a while to get it right and still only 2/4 fires turned out okay today. I've decided that fires never are perfect and I'm leaving it (even though I re-painted one). 
I started my design with two coats of black, 1 hour drying time cause I had the time. Then I started with the writing on my thumb, and for once I did both hands simultaneously, I usually do one hand and then the other to avoid mess. This time I knew it was going to take long so I just did both. Anyway. I wrote on my thumbs, and then I stuck my stickers onto my ring fingers. After that I added the orange to my letters, and then I sponged on a yellow on my index finger, waited a bit and then sponged on gold. Before I closed the bottle I painted the tips of my ring finger. Then I painted the 12 going white - orange - black. I didn't want to use red simply because my red polish isn't very new and I got a new orange one today, but afterwards I was really quite pleased with how the orange was a bit softer and blended better with the other colors on the other nails. 
After finishing both 12's I took my black crackle polish and covered the tips of the index and ring fingers. Then came the dreaded flames. Uhhhh it was really annoying, they're so hard to get right. The method is that you basically cover your whole nail with clear / (in this case) black polish, and then you draw thick lines/dots on the tip of the nail with colors of your choice, and then you take a needle or a thin toothpick and swipe through the polish to make a fiery pattern. On my first middle finger I was using Seche Vite as the background, totally forgetting it's fast drying. That's very bad for this method, so on the other nails I used my black polish. This method also puts a very thick layer of polish on your nail, after 2 hours I accidentally scratched it and realized it was still very wet. I applied my top coat after fixing the scratch and it's starting to feel hard now (another almost 2 hours after the accident). It's really annoying me how my pinkies got better flames than my middle fingers, who are much larger, but oh well.
I really enjoyed making this design, and even though I used many methods, I didn't use that many colors, which always feels good when I'm not making the same design on every nail (again, remembering that horrible Valentines idea spam that was completely incoherent). 
Happy Hunger Games!
Tialiq

Tuesday, March 20, 2012

Tape Disaster!

Oh dear. Oh dear, oh dear, oh dear. I'll just show you the picture and you'll know what I mean.


I hope you can kind of see my plan with these nails; a shocking but matte base color with spikes that fade into black and give a strong contrast, with a bit of glitter for that extra shiny/matte contrast that is so adorable. I shouldn't have used clear tape for this, not at all, but my masking tape wasn't sticking and I don't have skin tape (that I've seen other people use). I've used clear tape before, but on a nail without polish. 
I really want this design to work so I'll probably give it another try. Then I'll probably freehand it and try using a minimalistic sponge, or wait at least 2 hours for the matte coat to dry before using clear tape again and then just sponge white and black really fast and freehand the rest. Another way to go about it would be to just having it clear until the end and freehand the matte coat, or maybe I could do the background coat last, or maybe just have them switch places, but not use yellow because having yellow tips even if it's on purpose is just wrong in my eyes. Or maybe I could just make the background coat the shiny one and have the gradient tips matte, then I could use a metallic, lighter yellow as well. 
Either way, I'll attempt this design again when I've figured out which way to go about it, and when I have a bit more time.
Since I was doing this on impulse last night it was quite late, and seeing it get ruined after almost 3 hours of work, all of it drying times, I got quite frustrated. Oh well, happens to the best of us. So I did a simple, slightly V shaped french and covered up the fact that I wasn't very careful making this with some bling. It'll last me until I'm making my Hunger Games design this Thursday.

My fingers are still messy from the yellow polish in this picture, it wasn't even close to dry (annoyingly enough) so it slid off in big, half wet chunks and ended up everywhere. Disaster indeed!
Tialiq

Friday, March 16, 2012

Blue Forest!

Today I actually had no idea what I wanted to paint, except that I wanted it to be blue, have no patterns, but no figures from series either, and nothing too easy and fast. That narrows it down doesn't it.. Haha. So I started by mixing my own base color, a soft pastel blue, and as it was drying I realized I wanted to do a forest with mist and stuff. So this is what I made! It has a lot of hidden details that I'm not sure you can see in the picture, but I kind of like them. I think. I haven't really made up my mind yet.


This is the finished result. I think the most fascinating thing is that I almost only used two polishes for this, white and blue. There's a tiny bit of grey at the top and then of course my top coat, but otherwise the picture below was everything I used. 


Fantastic how easy it is, isn't it? And so much fun!
Tialiq

Wednesday, March 14, 2012

Hunger Games Ideas!

With almost only a week until I see the premiere of the Hunger Games - a series that I've loved for many, many years and anxiously waited for during these slow, painful years - I decided it was time to start planning for what I'll wear on my nails on that special occasion. I've seen a lot of designs on YouTube, a lot of them involving the circles from the original covers. I've decided to scrap that idea completely since the covers had another design in my country, which is how I first read them. The mockingjay, on the other hand, is also very tempting, but then my other nails would have to be simple because otherwise it might look messy, and then those circles I don't want will be annoyingly fit. 
Anyway.. 


So here're the ideas so far, plus a princess design I had to get down that I thought of a few days ago. The top part should be pink but I realized that a bit too late.
I'm thinking that maybe I should do the big 12 with the other fire design overlapping it, I'll have to give that a try. I've also tried the "marble method", where you put stripes of the colors you want (I covered my nails in black, then tipped it with white, striped the white with red - orange - yellow) and then drag a needle through it until you get the desired flames. However, I had a bit too much fun with it and it got too messy so I cleaned it off without taking a picture. 
I'm so excited for the Hunger Games though!
Tialiq

Sunday, March 11, 2012

Kyo!

Today I finally got to make a design from one of my favorite anime shows; Fruits Basket! This is my favorite character Kyo (also spelled Kyou but I decided on skipping the U to make it easier). 


I wanted to actually draw him on my nails but I'm not that good yet, so it'll have to wait. And I'm realizing now how messy my hands are in that picture, oh well. 
Tialiq

Saturday, March 10, 2012

Rainbow!

So today was nail painting day, and I couldn't decide what to make. I had so many ideas but none that really caught my attention. So I just started painting, and it became a rainbow. Then I remembered I have this shiny white polish that's sort of see-through depending on the light, so I topped my rainbow design with that and added a few rhinestones. The thumb and ring finger got quite blinged and the others stayed simple with one 2mm and one 1mm each. 


Here you see the design before the white polish, and after in direct light and dim light. The stripes didn't have to be so accurate since it doesn't really show though the white. Cool huh? It's very shiny but if looked at the rainbow is very visible. And I do love rainbows!
Tialiq

Thursday, March 8, 2012

Logos!

Today I decided to challenge myself and copy something, preferably something difficult. And what's more difficult than the Coca-Cola logo? Then I ended up making a few more drink slogans, more specifically 7-up, Fanta, Sprite and Pepsi. But I hope you can tell from the picture!


I had a lot of fun, all the steps were fun and even though I was copying, which I'm usually not very good at, I think I did alright. And here's one I made yesterday;

That one took.. a bit longer than the ones I made today, haha. Even though it takes time, it's fun to do and the results make it worth it!
Tialiq

Monday, March 5, 2012

Fire!

Hello! Today I broke a nail and had to cut my babies, luckily that gave me the opportunity to paint my nails! 


The original idea was cherries. Funny, huh? Then I decided I wanted something dark and fierce to show under the cherries, like an evil personality hiding under something cute and pretty (Been watching too much Revenge, haven't I?). So I decided to make a zipper, zipping the pretty cherry cover open to show something dark and evil. That dark and evil ended up being fire, so I painted a fire, added a few pieces of golden glitter - one by one - and painted the sides white. Then I sponged on a little bit of a thin silver polish to make it a bit more interesting. As I was going to start on the zipper I ended up with this:


I kind of think it looks like flowers, or a torch maybe. Whatever it is I'm loving it and decided not to finish the zipper. Painting nails always make Mondays a bit more easy to handle! 
Tialiq

Sunday, March 4, 2012

First post!

First post, I'm so excited. I've been pondering starting a blog for my relatively new passion; nail art, for a while now but never really got to it. Until now!
As a first post I'm simply going to spam the interwebz with pictures of my previous designs to get this place some content, and then I will upload 2-3 times / week when I do my nails. I value simplicity but also elegance, and I'm not a big fan of animal prints.. You'll see. I will also post quick notes on how I made the design, and sometimes what inspired me. Here we go!


Hello Kitty nails, first time I tried proper nail art. Up until then there had only been ugly french tips on black nails, or just simple colors. Only fair that the first design I made was of my favorite character!


This is my blue plaid design that I'm wearing today. I've hated plaids since I gave it a try in December but finally dared going there again. I covered the plaid with a matte top coat, and the blue side with a silver glitter polish. 


This was my first attempt at marble, I did that thumb 3 times before it turned out well... The color combination is horrible, but I decided to play safe and only used polish I'd bought the same week. It took hours to make and it took a while before I tried it again.


This was my Christmas nails! I decided to go for a simple, icy sparkle french tip and a little holly branch, very Christmassy. Not a big fan of all the reindeer's and Santa's. 


I made there nails on fake nails when my head was overloading with ideas, I quite like them but I've never worn any of them. The simple barbed wire design is the only one I've been wanting to wear, but I've never lacked so my inspiration as to do a design I've already painted.


This is my Domo-kun design, my second design. I painted the whole mouth with a toothpick and made the eyes with a bobby pin, I had almost no tools back then.


Here I started getting creative, this was my fourth design and I decided to show my geeky loyalty to the Horde. It was very much approved by my equally geeky friends!


This was the first time I used acrylic paint! I found it in a cabinet and most the colors were dried out, but the black still worked! I'd been dying to do Justice League, and I decided that I wanted all my nails to have the same background. After my Valentines ideas that were an incoherent disaster (they're further down due to the not so chronological order) I decided that this was best. Gold is such a superhero color as well.


This was my birthday design. My favorite color is purple and I'd just received my fimos the week before. I sponged on the colors, made the white striped and dotted the ends with silver glitter. I love gluing on things so I went pretty crazy with the stones. I love this design!


This was my third design, and it is a complete ripoff of Cutepolish's mustache nails (http://www.youtube.com/watch?v=6wc66W0lYx0) .


.. As is this Nyan Cat design (which took forever!) (http://www.youtube.com/watch?v=E0dqgXVU6wA)


This was my Valentines Design, and I made a quick step-by-step image, with instructions; 
1: I put clear tape diagonally over my the tip of my nail.
2: I painted the visible nail with a base coat and then two coats of white.
3: With a sponge I applied 5 different colors, grading from soft beige, through 3 pinks to a light red. 
4: With my new striper (♥) I applied slightly tilted lines, and then lines crossing over them.
5: I finished my lines and applied glitter over them. Where the lines met I put hexagon glitters. Then I removed the tape (Best feeling ever fyi.).
6: I painted my tips with a base coat and two coats of white.
7: Then I applied big rhinestones in the middle, covered them with clear polish, and then applied two smaller stones on each side. 
To finish off I covered all my stones and the bottom on my nail with a shiny top coat, and the white tips with a matte top coat. Since it's my right hand it got a bit messy so I cleaned that up. 
This design was suuuper easy and that's why I wanted to show it, it took me about 2 hours to finish, considering I completed my left hand first, and then did my right. It's such a bother to have both hands taped at the same time.  


This was a design inspired by the t-shirt Sheldon of Big Bang Theory was wearing in an episode, I can't remember which one. It ended up looking pretty futuristic so I added silver dots to the middle.


This is a design I painted for my mum, she wanted something simple and winter-y.


Another one of my favorites, this was the first time I used glitter! I'd just bought the wheels that are discreetly shown in the background. I decided to go for the sunset I'd seen when walking home, with black plant silhouettes. What I saw was a snowy field with a line of trees covering the sunset, but my friends seem to think its a sunset over a lake. It's up to the individual I guess :)


Tetris nails, made them when I'd developed an unhealthy addiction to Tetris Battle on Facebook. It was my first time sponging and I didn't have a sponge, so I used a cotton pad... Hence the mess. 


The Valentines idea-spam-disaster that I mentioned. I do like the couple and the chains though, planning on re-doing them.


My second time marbling, this time with greater success and a smaller mess. I added fimo watermelons and silver stripes to make it more interesting.


Ah, the first time I successfully sponged with a real sponge. I wanted to make a sky design and I just started with the black and it all just.. came. 


A yellow and green summer design with hibiscus flowers in white, not as visible as I would've liked and I wasn't comfortable lining with black. Made this during a dark winter night, longing for summer.


Zelda! Another one of my addictions showing on my nails. This was really fun and easy to do, and I got quite a good reaction from my friends. I want to do another Zelda-inspired design soon.


Simple flower nails I made whilst on holiday, I only brought 4 polishes so this is what I ended up with. I quite liked it though.


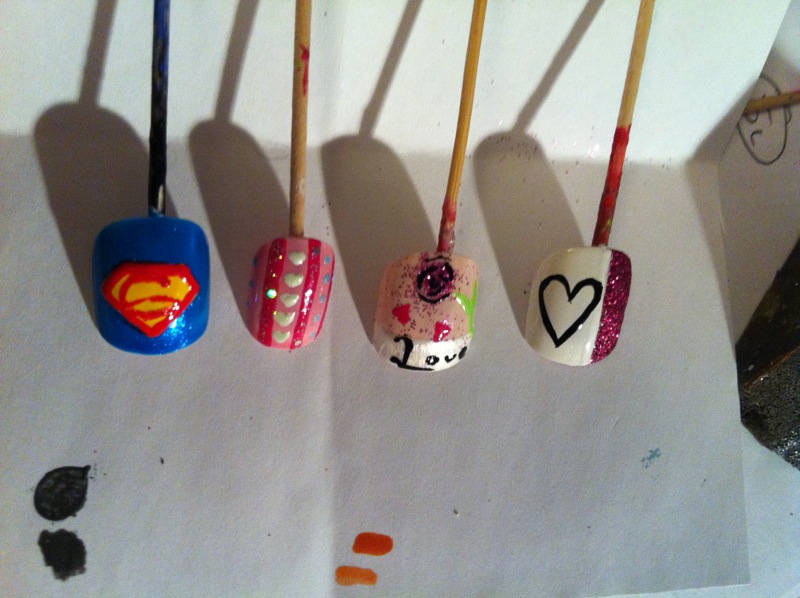
Another release of ideas, these aren't very good but I enjoyed making them.


While trying to think of Valentines designs I got slightly sidetracked by Portal, so I made a design with that as well.


Another attempt at Valentines designs, this time I got sidetracked by something else!


My first horrible design, I had no concept except that I wanted to use glitter. Taking this off took an hour.

And there we go! Most of my nail designs already archived in the longest first post I've ever seen in my life. I'll see you later! 
Tialiq