So, during April I didn't make many nerdy or cool designs.
I started the month off with a blue gradient with animal print.
I sponged on silver before the blue to make it smoother but it didn't
show too well. I wanted to cuticle area as nautreal as possible so that
the nail could grow without it looking terrible. I thought it was a good
idea at the time, at that moment not remembering that I change my
manicures twice/week.
Then I moved on, wanting something bloodier I made these Yakuza (Japanese mafia) inspired nails.
I don't know, I just had this mental image of torn newpapers thrown across a dark room with a newly decapitated body laying in a shaggy bed, with leather clad Yakuza members leaving the room carrying bloodied katanas. Eh. Yeah that's the inside of my mind. I wanted the leather to have studs, but my studs were way too big for my tiny little nails, so I went with rhinestones instead.
I'd been wanting to have actual newspaper on my nails since I realised that the Japanese ink doesn't transfer using alcohol. Having the whole "leave the cuticle area free"-idea also helped, because now I didn't need to cut perfect nail-shaped bits of paper. I tore it instead, complimenting my mental image. I stained the paper with acrylic paints and let it dry, and painted the back of the newspaper with white polish so it wouldn't be seethrough.
These nails were however very bumpy at the edge of the newspaper, and you'll need to completely seal every tiny bit of the newspaper to prevent water from reaching it. Otherwise it tears. Also, this is probably only connected to the Yakuza with the Japanese newspaper. And that's a pretty vauge connection. Anyway. Moving on!
After this I recieved a beautiful blue polish for Easter, and wanted to do it justice with a simple but elegant design.
This is silver crackle polish working its magic. I really loved wearing these nails. Even though the blue bubbled a little bit.
Then I wanted to wear yellow, because that's another polish I got for Easter, but this design was far less successfull. I was inspired by the intro to Yakitate! Japan!, which has this adorable plaid background in yellow amongst other colors. But I made the pattern too big (being horrible at and hating stripes), so I wasn't too happy with it. In fact, I started picking at it before even taking a picture!
Then I continued on experimental street and decided I hadn't traumatized myself with a water marble for a while. I had these new, silky polishes that demanded being wasted in water. (I bet you can already tell this one was a failure).
The only good this about this design was that they looked blue from a distance. I tried to save it with glitter and flowers, but failed. I don't think water marbles is my thing.
And that was April! The only design I loved this month was the chic blue one, but May holds promise!
Tialiq
Tuesday, April 30, 2013
Monday, March 25, 2013
TERA! - decomposed gear!
Yes, lately I've been playing TERA, which is a Korean MMORPG. It's awesome! Then I got this beautiful chest piece:
And I just had to make a nail design out of it.
I made it a bit more purple than it actually is (later I dyed the piece more purple as well), but I'm prety happy with the result!
I started with a nude pink on my thumb and ring finger. Silver on my index and little finger, and a pink (that's called "Rich Lilac" but it sure looks pink to me) on my middle finger. Then I added a dark, plum purple to my nude pink nails, in different shapes.Then I added sharp spikes outlining the shapes. I made a filigree based on the back of the chest piece n the index finger, and a cluttered, circular leopard print on the middle finger.
Then I added silver to the thumb and ring finger, outlining the purple, and to finish it off I mixed the same pink that's on the middle finger with a bit of pink glitter, and dotted it on the thumb, ring and little finger.
So simple, so weird and so nerdy. Love it.
Tialiq
And I just had to make a nail design out of it.
I made it a bit more purple than it actually is (later I dyed the piece more purple as well), but I'm prety happy with the result!
I started with a nude pink on my thumb and ring finger. Silver on my index and little finger, and a pink (that's called "Rich Lilac" but it sure looks pink to me) on my middle finger. Then I added a dark, plum purple to my nude pink nails, in different shapes.Then I added sharp spikes outlining the shapes. I made a filigree based on the back of the chest piece n the index finger, and a cluttered, circular leopard print on the middle finger.
Then I added silver to the thumb and ring finger, outlining the purple, and to finish it off I mixed the same pink that's on the middle finger with a bit of pink glitter, and dotted it on the thumb, ring and little finger.
So simple, so weird and so nerdy. Love it.
Tialiq
Mint Leopard!
I wanted to try paint my nails in a new pattern, and what better way than an easy leopard print?
I started with a light mint green on my thumb, middle and ring finger. I painted my index and little finger bronze. With the same bronze, I added spots on the green nails, in a tilted pattern. Then I outlined the spots with a dark brown acrylic paint. Added some brown dots, and then I covered all the bronze areas with a bronze glitter. On the second coat of glitter, only on the bronze nails, I also added some green glitter to try make it melt together more. In retrospect I know that it would've looked better without the green glitter, it matched enough anyway.
But they're still gorgeous!
Tialiq
I started with a light mint green on my thumb, middle and ring finger. I painted my index and little finger bronze. With the same bronze, I added spots on the green nails, in a tilted pattern. Then I outlined the spots with a dark brown acrylic paint. Added some brown dots, and then I covered all the bronze areas with a bronze glitter. On the second coat of glitter, only on the bronze nails, I also added some green glitter to try make it melt together more. In retrospect I know that it would've looked better without the green glitter, it matched enough anyway.
But they're still gorgeous!
Tialiq
Sunday, March 17, 2013
Oz the Great and Powerful!
Oz the Great and Powerful! I saw it yesterday and was really inspired. Evanora, the wicked witch, wears this awesome black design throughout most of the film, and I tried to recreate it best I could.
I tampered with it slightly and added rhinestones. If Oz had rhinestones I'm sure she would wear them. If I was going to wear the design I'd add a neutral or pink nail polish as a base, since she just wore black on top of a bare nail. It's definitely a cool idea!
The gold and silver design is inspired by Glinda, the good witch. She wears this dress with silver sequins and gold detailing at the shoulders and the wrists. It's very subtle, it took me a while to notice it. For the design I also added glitter flakes to make it sparkle more. It also makes it blend more, you only see the pattern if you really look.
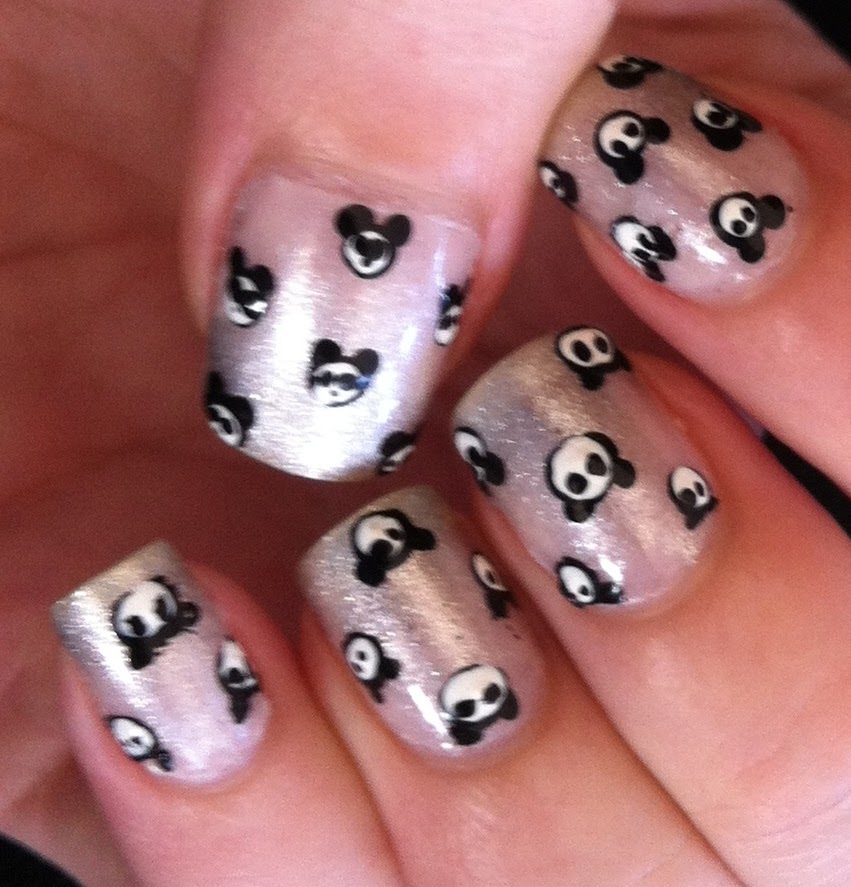
Also adding the design I'm wearing at the moment; it's a simple dotting design.
What can I say, I really love pandas!
Tialiq
I tampered with it slightly and added rhinestones. If Oz had rhinestones I'm sure she would wear them. If I was going to wear the design I'd add a neutral or pink nail polish as a base, since she just wore black on top of a bare nail. It's definitely a cool idea!
The gold and silver design is inspired by Glinda, the good witch. She wears this dress with silver sequins and gold detailing at the shoulders and the wrists. It's very subtle, it took me a while to notice it. For the design I also added glitter flakes to make it sparkle more. It also makes it blend more, you only see the pattern if you really look.
Also adding the design I'm wearing at the moment; it's a simple dotting design.
What can I say, I really love pandas!
Tialiq
Friday, March 8, 2013
Aperture Science!
I love the Portal games, especially the first one. I've always wanted to make Portal nails, but thought it was too hard. Until I figured out how to make the Aperture logo! These are easier to make with a theme song.
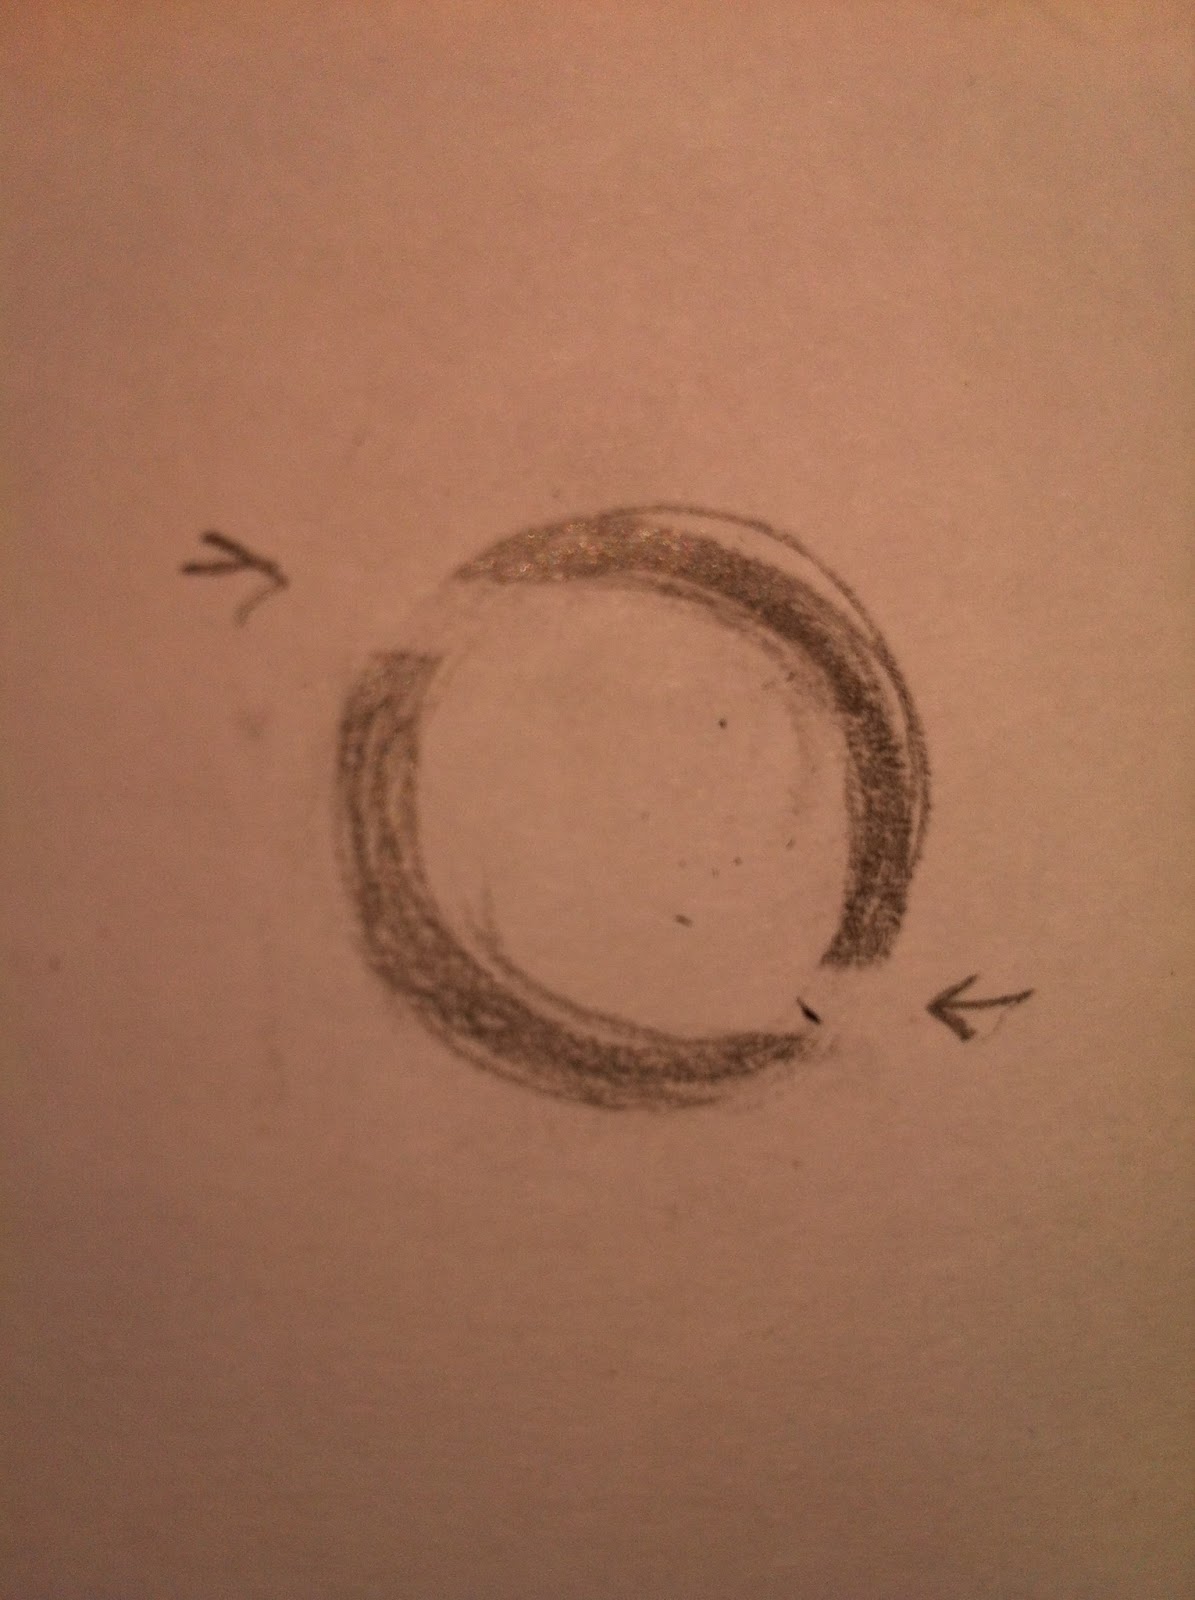
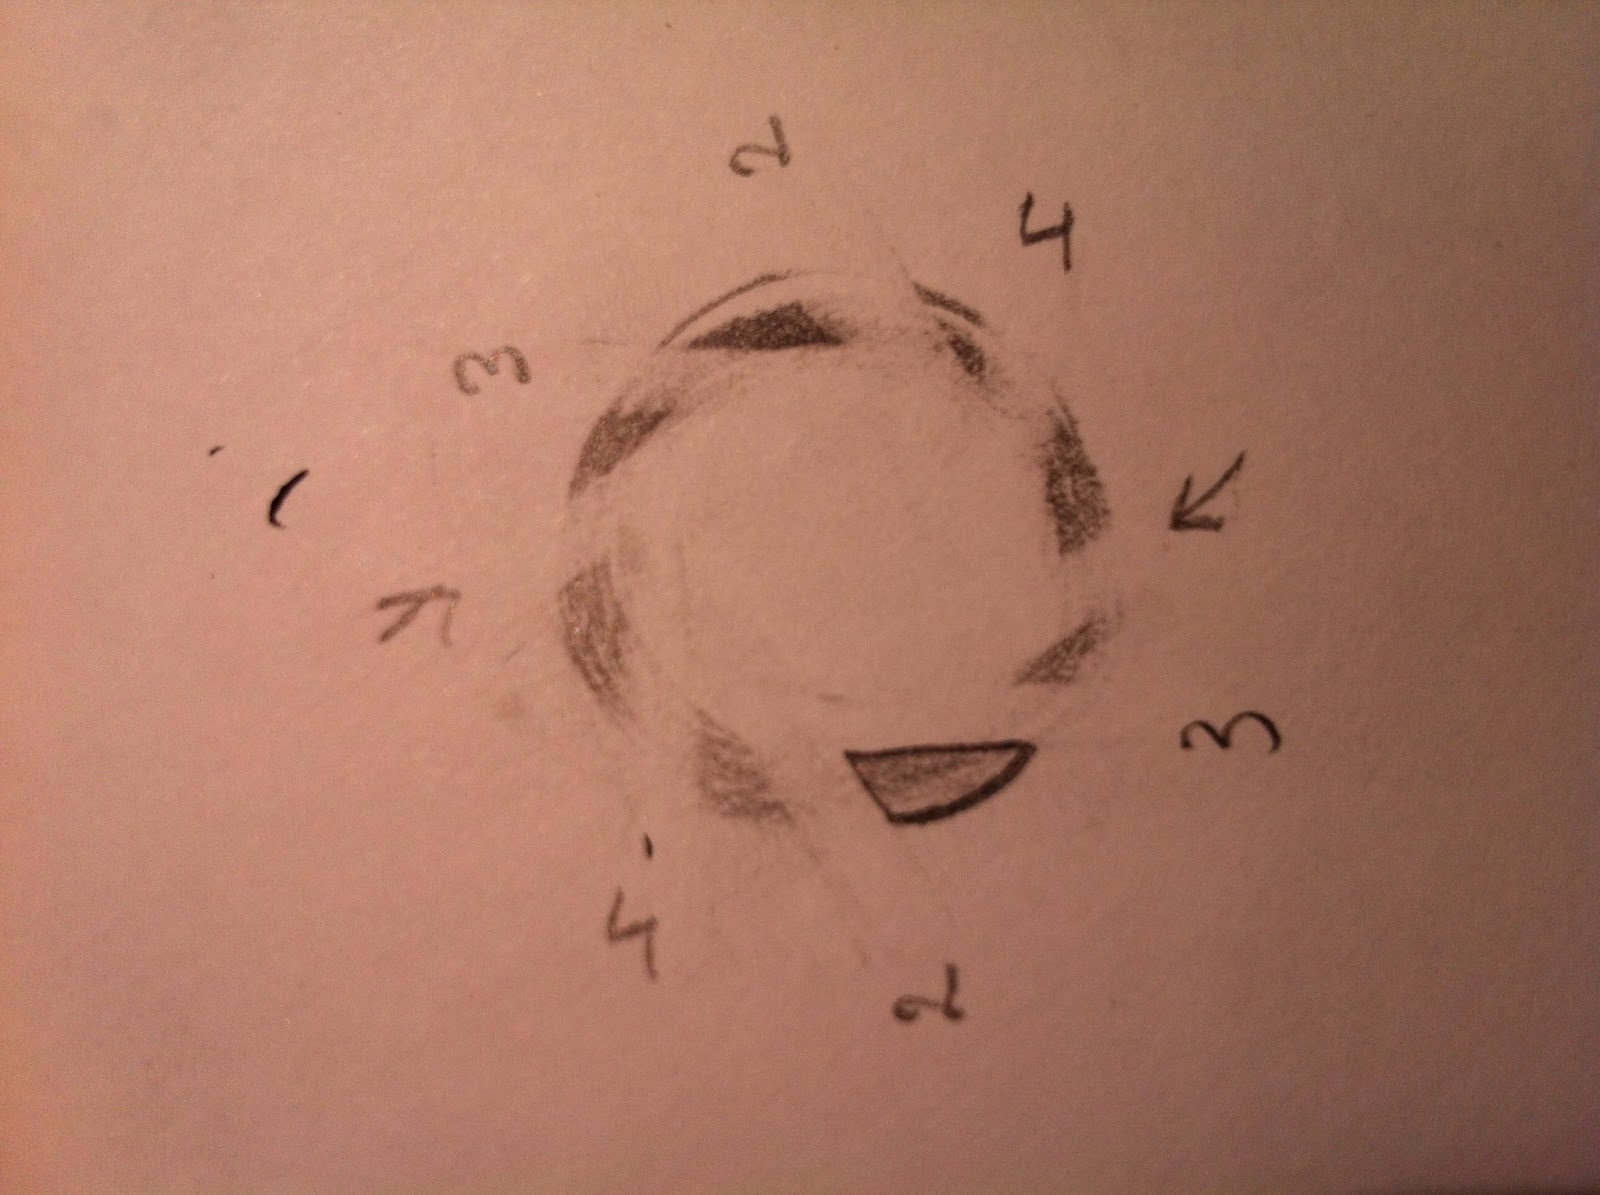
Start with a circle and erase horizontally in the top left, and the bottom right. Erase in nail art terms, means apply your base color.
Now, twist 45 degrees so you get a square balancing on a point, and do the same thing.
Finish off the empty areas.
You should end up with rough triangles. Outline them and make it neat.
And that's how I made these Aperture nails!
For my left hand I used the plastic bag method. I love these, I'm so happy I figured it out.
Remember, the cake is a LIE!
Tialiq
Start with a circle and erase horizontally in the top left, and the bottom right. Erase in nail art terms, means apply your base color.
Turn it 90 degrees and do the same thing, horizontally, top left and bottom right.
Now, twist 45 degrees so you get a square balancing on a point, and do the same thing.
Finish off the empty areas.
You should end up with rough triangles. Outline them and make it neat.
And that's how I made these Aperture nails!
For my left hand I used the plastic bag method. I love these, I'm so happy I figured it out.
Remember, the cake is a LIE!
Tialiq
Kerbal Space Program!
Oh yes. This game is awesome. I've been watching people play it; I don't think I have the patience for it to be honest. But I love the Kermen and I decided to make a nail art!
I started with my black polish that has the little blue micro glitters in it. I prefer blue-based blacks over red or green-based, they just look more.. black, to me. Oh and I love anything blue.
I made their little heads mixing a white, green and brown acrylic paint. I made the top of their heads heart-shaped, and the bottom straight. Then I added big, white eyes and their mouths. The smiling one looks like he's about to kill someone, I didn't get the mouth right. He's also a bit discolored since I initially made his mouth bigger, and then covered with the green skin color, and it didn't cover enough. Oh well! I finished with a little bit of black on the tip of my bristles, and violently dotted on a bit of hair.
On the rest of my nails I made space.
I took 4 shimmery or glittery polishes, and sponged them on randomly. I used a holographic blue, a glittery purple, a gold and a silver. I topped it off with a glitter polish. Wondering about my little baby?
I had an accident. I know, terrible isn't it! Now I have to patiently wait for it to grow out.
Loved sporting these Kerbal nails though! I love having faces on my nails!
Tialiq
I started with my black polish that has the little blue micro glitters in it. I prefer blue-based blacks over red or green-based, they just look more.. black, to me. Oh and I love anything blue.
I really wish I could rotate this.
I made their little heads mixing a white, green and brown acrylic paint. I made the top of their heads heart-shaped, and the bottom straight. Then I added big, white eyes and their mouths. The smiling one looks like he's about to kill someone, I didn't get the mouth right. He's also a bit discolored since I initially made his mouth bigger, and then covered with the green skin color, and it didn't cover enough. Oh well! I finished with a little bit of black on the tip of my bristles, and violently dotted on a bit of hair.
On the rest of my nails I made space.
I took 4 shimmery or glittery polishes, and sponged them on randomly. I used a holographic blue, a glittery purple, a gold and a silver. I topped it off with a glitter polish. Wondering about my little baby?
I had an accident. I know, terrible isn't it! Now I have to patiently wait for it to grow out.
Loved sporting these Kerbal nails though! I love having faces on my nails!
Tialiq
Blue Flowers!
Yes, blue again. I bought this fantastic black polish with blue micro glitters in it. Unfortunately, the glitters only really show when the polish is wet. A definite letdown! But I applied it over all my nails, and added simple flowers. I loaded my brush as if I was doing a one stroke, using a flat brush of course, but dabbed in the petals instead of using a stroke. Much easier, and very pretty!
I added some dots and a bit of glitter in the center of the flowers. I really like them!
Tialiq
I added some dots and a bit of glitter in the center of the flowers. I really like them!
Tialiq
Subscribe to:
Posts (Atom)